Kapi Dripper Recipe
The Kapi Dripper from The Right Brew is quickly becoming one of our go to brewers here at Basic Barista brew bar. With its sleek, flat bottomed design and fast flowing draw down, this dripper is perfect for those looking to brew clean, expressive cups of pour over coffee with minimal fuss.
Whether you're experimenting with filter coffee for the first time or just want a consistent daily driver, the Kapi dripper is easy to use, repeatable and consistent time and time again.

Basic Barista Kapi Dripper Recipe:
What you’ll need:
- 20g of filter roasted coffee beans
- 300g of water at 95ºC
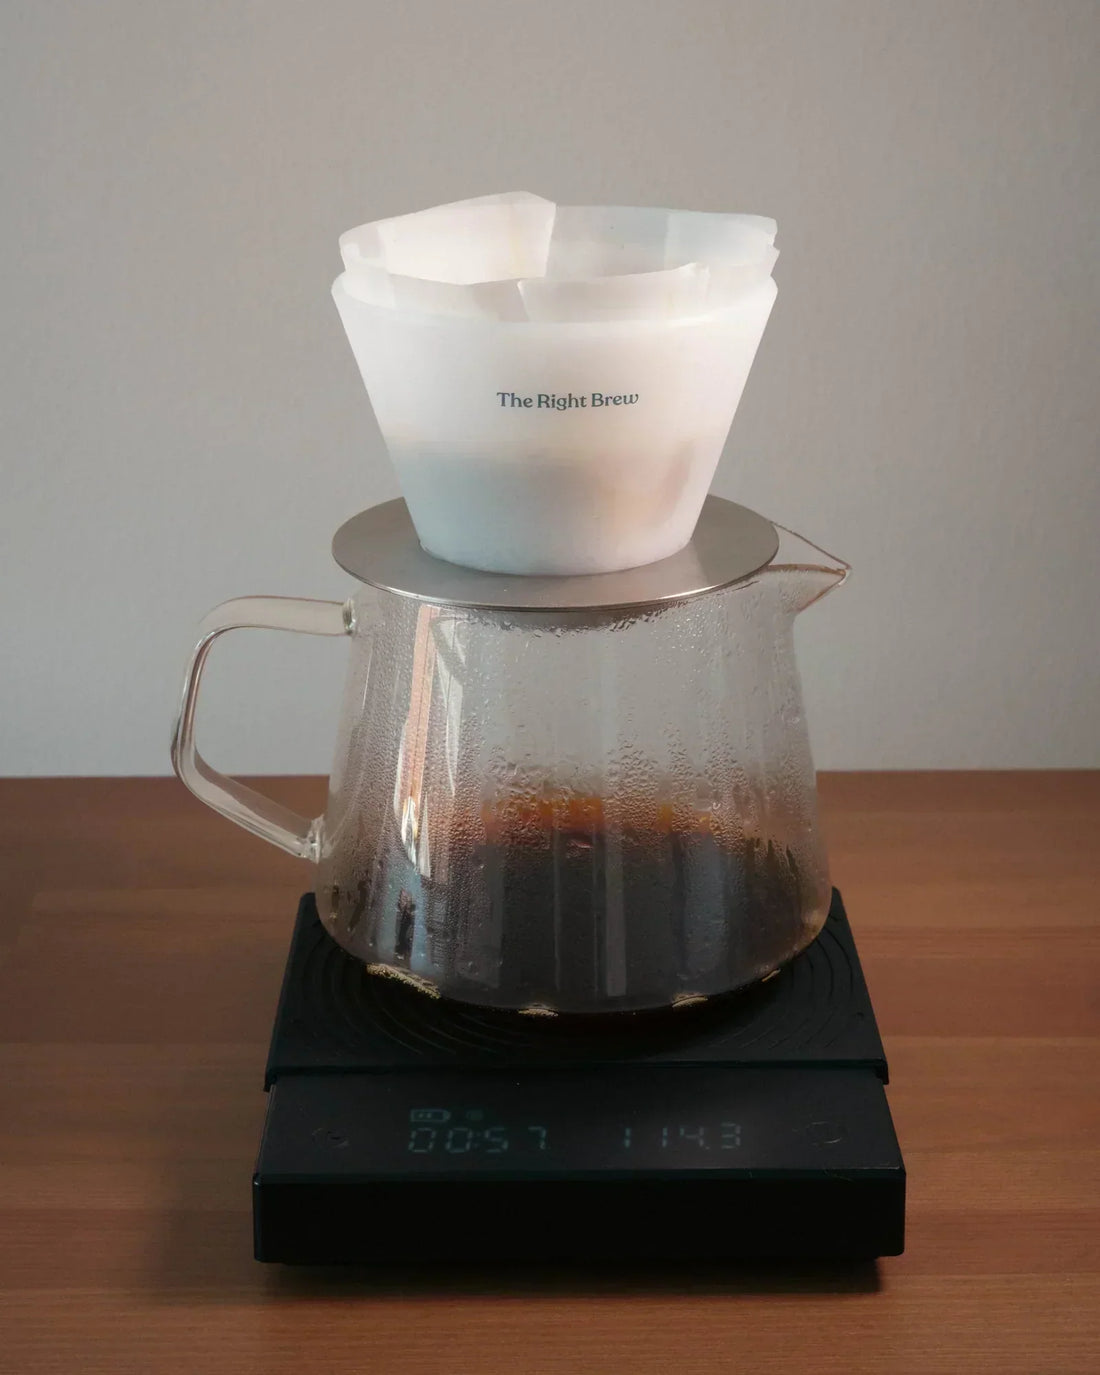
- Sibarist FAST Flat filters
- Coffee grinder
- Kapi Dripper, of course
Brew Method:
Step 1: Grind your coffee
Grind your 20 grams of coffee beans medium-fine. Just a touch finer than your usual pour over coffee recipe. If you're using a Comandante C40 I recommend starting at around 20 clicks (600 microns).
The Kapi's fast flow rate handles finer grinds like a champ and will help balance clarity and body.
Step 2: Prep the filter paper
The Sibarist FAST Flat filters are perforated, meaning you can easily fold along the four creases to shape your filter paper. Place this inside the Kapi Dripper and using hot water go ahead and pre wet the filter paper, this also preheats the dripper and removes any paper taste. These Sibarist filters pair beautifully with the Kapi dripper, allowing an unrestricted flow for fast and clean brews but are certainly not the cheapest option, scroll down to the bottom of this page to see a full list of compatible filter papers you can use on the Kapi Dripper.
Step 3: Add Coffee & Set Up Brewer
Place your Kapi dripper on top of the included stainless steel base and position this on your server of choice or directly over your coffee cup. Add your 20g of ground coffee into the filter and give your dripper a gentle shake to level out the coffee bed.
Step 4: Pour in 3 Stages
For this recipe you’ll be pouring in three equal stages, the idea is to use a low agitation and instead rely on the fine grind size and fast flow rate of the Kapi dripper to do most of the work. Aim for pouring in slow concentric circles and try to position your kettle as close to the brew bed as possible.
- First Pour: Add 100g of water. Let it bloom and draw down fully at the 45 second mark proceed with your second pour.
- Second Pour: Add another 100g of water and allow it to draw down.
- Third Pour: Final 100g of water. Wait for the coffee to completly draw down.
Step 5: Server
Your total brew time should land between 2:00–3:00 minutes, depending on your grind size and the coffee you use. You’re left with a cup that’s clean, sweet, and consistent every time.
Why We Love the Kapi Dripper
The Kapi Dripper features 5 small holes surrounding 1 larger centre hole, creating a wide and efficient exit for your brew water. This results in faster flow and less chance of clogging, even with finer grind sizes. The base also has small support ridges that lift your filter up from the base this design further helps eliminate the risk of stalling, a common issue with flat bottom coffee brewers.

It’s light, durable, and perfect for dialing in faster brews without compromising clarity. Whether you’re brewing at home, in a cafe, or on the go, the Kapi brewer gives you full control without overcomplicating the design.
Because of the bright vibrant colours, consistent results and easy to use design, I can definitely see the Kapi dripper quickly becoming a coffee dripper of choice in Melbourne cafes.
What Filters Can You Use On The Kapi Dripper?
- Kalita Wave (185 Size)
- Sibarist Fast Flat Filters
-
Sibarist Fast Flat Orea Filters
-
Origami Wave Filters (M-4Cup)
- Aji Circle Filter - Universale Coffee Filter

Brewing Kapi Dripper on Nucleus Paragon Stand:
The Kapi Dripper includes a solid stainless steel base but by removing this base you can use the Kapi Dripper on quite a few different pour over brewing stands.
By using the Kapi Dripper on the Nucleus Paragon Pour Over Stand you can explore extract chilling pour over coffee and experiment with combining brewing with flat bottom brewers and coffee blanching!
We had great results with experimenting on a brew that was extract chilled for the first 100g pour of water.
Should You Brew Flat Bottom or Conical Dripper?
This is the age old pour over question and the Kapi Dripper makes a strong case for team flat bottom.
Flat-bottom brewers like the Kapi dripper tend to promote a more even extraction. The wide base and multiple drainage holes encourage a uniform coffee bed depth, which means your water interacts with all your grounds more consistently. This helps reduce channeling and often results in cups with more balance, sweetness, and clarity.
Conical drippers like the Hario V60 usually push water through a narrow central point, which can highlight acidity and complexity but also makes them a bit more sensitive to pouring technique and grind size. If you’re chasing clean, repeatable brews with a forgiving workflow, the Kapi Dripper is an ideal entry into flat-bottom brewing and honestly, a great option even for pros who want speed and consistency without sacrificing quality.

How To Dial In Your Pour Over Coffee
Dialing in your coffee with the Kapi Dripper is refreshingly simple thanks to its fast and stable flow rate. Here are the main elements to focus on:
1. Grind Size
Start medium-fine and adjust based on your brew time and taste. If your drawdown is too fast and your coffee tastes under-extracted (sour or weak), go a touch finer. If it’s stalling or tasting overly bitter or hollow, coarsen it slightly.
2. Water Temperature
Start with water at around 90–95ºC. I found that brewing with the Kapi Dripper retains quite a lot of heat in the dripper and doesn't require hotter water to compensate.
3. Pouring Technique
Use pulse pours in 3 stages (as in our recipe). Let each pour fully draw down before starting the next. This gives the water time to fully saturate and extract from the grounds without over-agitating. If you find that this is drawing down too quickly for the coffee you're brewing consider a finer grind size or adjusting the pours to have 5 pours instead of 3.
4. Taste, Adjust, Repeat
Take notes. If your cup is tasting too sharp or dry, slow it down with a finer grind or reduce the pour height. If it's too muted or heavy, speed up the flow slightly or raise your pour height to increase agitation.
The Kapi Dripper is super responsive, which makes it a fun and reliable brewer to experiment with. It's perfect for refining your pour over technique without getting bogged down in endless variables.
Kapi Dripper - Stainless Steel Base Mechanism
One of the biggest complaints people have with the Origami Dripper is that when it's sitting on the Origami Ring it becomes top heavy. This means that even by moving your dripper around post-brewing you run the risk of dripper your coffee dripper.
The Kapi Dripper has a hidden feature we discovered after using it for the first time. The Kapi Dripper sits on top of the stainless steel base and doesn't lock or affix, but when you start brewing coffee the heat starts to expand the stainless steel base which grips the plastic dripper tighter and locks the base and the brewer together.
I found that after brewing this gives me enough time to dispose of the coffee grounds and filter and then as soon as I run it over water the metal contracts and releases the brewer.


