AeroPress Barista Basics
So you want to know how to master an ‘AeroPress’? First we have to cover some basics. In all our topics we will be using barista terminology (something I like to call ‘the Lingo’) So if you aren’t a barista yet don’t worry at the end I have made up an easy to use definitions page.
The purpose of this article is to compile all the useful information so that anyone can pick up, skip around and have some idea of how to use an ‘AeroPress’. I decided to choose the ‘AeroPress’ for my initial topic as I believe it is one of the most adaptive and easy to use pieces of equipment.
I believe the ‘AeroPress’ is a great introduction to coffee because you are able to see the brewing. Unlike an espresso machine, the variables that you control are not automated.
What I mean by this is to stop brewing/extracting you don’t press a button, you need to physically stop pouring. Personally When I first made coffee I learnt on an espresso machine, but I found it much easier to grasp certain concepts when I was using an ‘AeroPress’.
1. AeroPress Parts
An ‘AeroPress’ is a percolator brewer combined with built up pressure via a plunger. Meaning that most recipes you will end up making include some form of percolation as well as the use of pressure to help induce the action. Granted the ‘AeroPress’ has an infinite amount of setups and attachments that do not utilise these two attributes, although percolation and pressure are note worthy as they are both found in majority of coffee brewing methods.
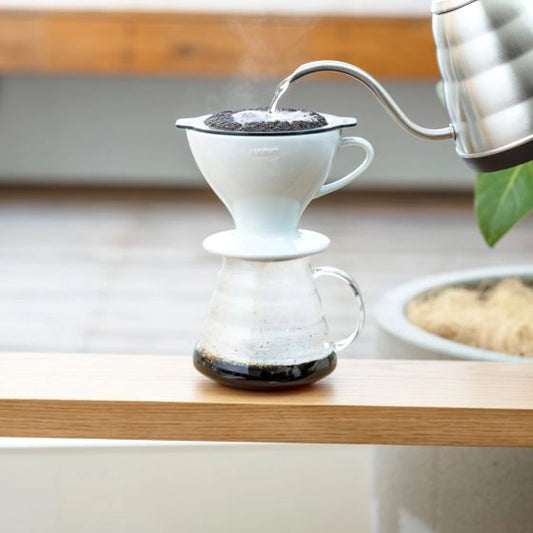
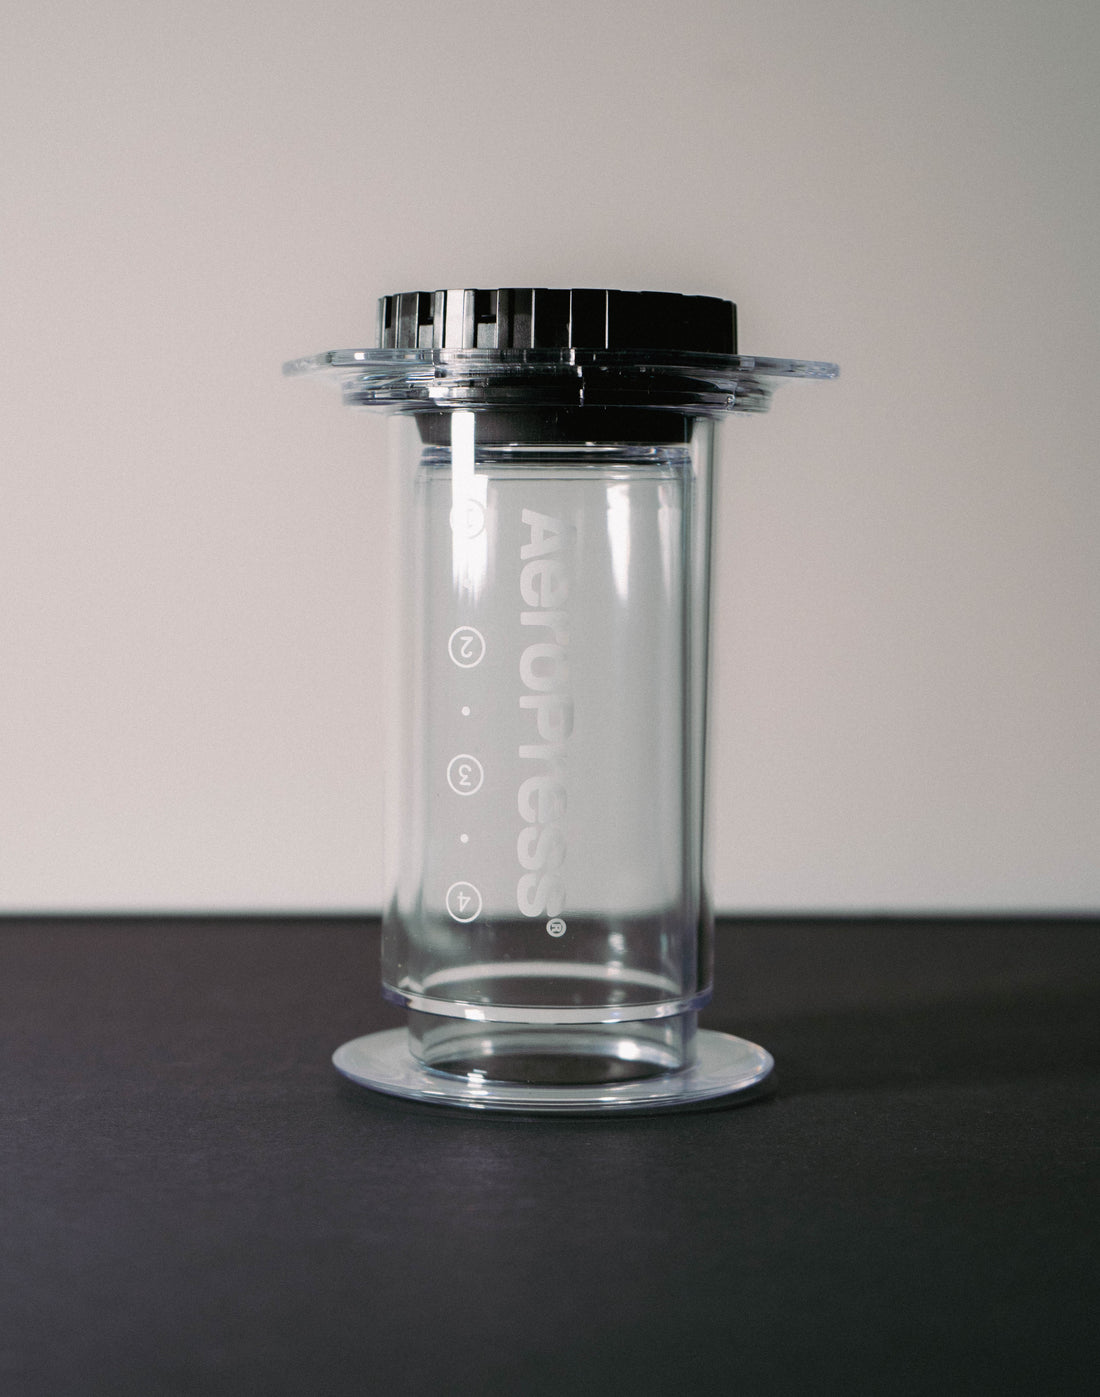
An ‘AeroPress’ is comprised of three main parts, three main actions and a whole bunch of accessories. The first part is the chamber. The chamber sits in the middle of the filter cap and the plunger. The chamber of an ‘AeroPress’ is a cylindrical tube that initially acts as a space where you brew your coffee and secondly a chamber that allows you to build up pressure induced by the plunger when you push down.
The plunger is made up of a piece of plastic connected to a rubber head. You use the plunger predominantly to build up pressure, but in some recipes which require the inverted method the plunger acts as the floor/base where the coffee is brewed.
Finally the cap, The cap that come with the official ‘AeroPress’ is intended for the use of circular paper filters. (micro-filters) Traditional brew methods have coffee forced through the chamber and pass the paper filter which is held in place by the cap. It is at this connection of the chamber where most third party attachments connect.
2. What You Need
The ‘AeroPress’ was invented by ‘Allan Adler’ in 2005 the initial design was focused around an inexpensive single cup brewer that could create espresso like coffee quicker than anything else on the market. The original recipe calls for 14 grams of ground coffee, 50 grams of boiling water, stir for 10-15 seconds and plunging with a total brew time of roughly 1 minute.
In order to use an ‘AeroPress,’ due to its vast array of different adapters and brew methods you will first need to decide what coffee you will make. Without any adaptors you can make black coffee similar to a pour over and play around with the ratios to create a fine-tuned recipe. We will focus on this first.
The first thing that you will need is coffee,Choosing beans can be confusing at times and getting caught up in origins, notes and altitudes isn’t for everyone. A simple equation to help you find the right beans is by asking. Most retail bags of coffee have diagrams which the roaster recommends for different brewing devices, but we recommend having a quick conversation with a barista in a cafe that sells beans.
After purchasing your beans you will need to grind them. There are a couple of ways that you can go about doing so. The first is the cheapest, most cafes/coffee shops that sell coffee beans will happily grind your beans for you.
The only time we recommend doing this is if you don’t have any other means of grinding your beans. The reason why we do not recommend this is because as soon as the beans are ground they start to loose a lot of aromas and flavours that make freshly ground coffee so vibrant and flavoursome.
The second grinding method we highly recommend is a small inexpensive hand grinder. (We stock an extremely user friendly hand grinder perfect for beginners on our website here.) The most important thing about this besides allowing you to grind fresh, is that you are able to adjust your grind size. Some recipes such as espresso require a very fine grind size, While other recipes like a cold brew work best with a grittier coarse grind size. Adjusting the grind size is very easy to do with hand grinders.
Water plays a big part in the characteristics of making coffee. The softness and hardness of the water you use will play a part in the taste of your coffee. The only time we stress over the water we use is for commercial espresso machines as water needs to be filtered and if not, it can cause internal damage to the machine. As far as water for an ‘AeroPress’ it is up to you whether the difference is noticeable or not. We encourage you to play around with bottled filtered water but in this hand book when we discuss water we will only be looking at the water temperature.
Depending on how thorough you want to be, a kettle with a built-in thermometer may be sufficient. There are also some kettles that maintain a set temperature, this would be particularly useful to you in a commercial setting when you are brewing coffee manually throughout the day.

3. Your 1st Coffee
You have your beans, a method to grind them, you have a kettle and a set of scales. Now, all you need is a timer.
We recommend that you have a log book or even use your phone to record some of your first attempts. This helps you to know exactly what you are doing and saves a lot of beans because you don’t forget what you have already tried.
The four things we suggest you record are:
The dose, Which is the weight of coffee grinds used, usually in grams but make sure you record your grind size as well.
How much boiling water you use in total. You can also record any pre-infusion or blooming
The time. How long was your total brew time. This is usually started at the moment of coffee coming in contact with water to the last drops of your brew.
Your yield is the weight of the final product. This is easily found by tarring the weight of your vessel (what you serve or drink out of) and then weighing the whole vessel with your coffee in it. This way you are weighing exactly what you have made. Your yield.
And finally drink it! Did you like what you have just made? Are the flavours too intense? Or are they too watered down? What did you like and what didn’t you like? Also what would you do next time to improve your brew?
4. Caps & Attachments
The cap of an ‘AeroPress’ holds the micro-filter in place and has holes to allow your coffee to exit through. The chambers locking mechanism is versatile and there are some after market products available that can turn your ‘AeroPress’ into a cold drip tower (‘PUCK PUCK’), a pressurised cap like the ‘Prismo’ by ‘Fellow’ which creates a more espresso like consistency.
After using the ‘AeroPress’ for a while you might find yourself caught in a bit of a loop using the one time use paper filters. Yes they do a fantastic job at creating a smooth filtered coffee but if the waste is an issue, you may want to consider using a metal filter. Some come with a rubber o-ring and others are held up against the original cap that comes with the ‘AeroPress’. These offer a great alternative to single use paper filters.
The ‘AeroPress’ doesn’t just offer a versatile brewer, but it helps to offer a more cost effective approach for curious coffee makers. If I wanted to try making cold drip coffee, I could sit there trying to punch holes in a water bottle or spend big bucks on a glass tower, the cold drip ‘PUCK PUCK’ attachment allows for an inexpensive alternative, and fits perfectly onto the ‘AeroPress’.

5. HOW TO MAKE A RECIPE
When we discuss coffee recipes it is similar to baking a cake, you have your ingredients flour or beans, your cooking time (extraction time) and your final product your cake (yield). Since there are three things going on in unison you will need to use different equipment to help control these variables. Let’s start off with my favourite ‘AeroPress’ recipe.
My recipe calls for the inverted method. Meaning taking the cap off and using the rubber part of the plunger as your floor. The first thing we are going to do is bring your water to a boil, (85-95 degrees Celsius) while boiling your water weigh out 15grams of beans and grind them to a medium coarse grind, slightly finer than sand is the best way to describe the grind size you’re looking for.
Put the inverted ‘AeroPress’ onto your scales, (you can preheat your ‘AeroPress’ prior to this step by pouring some hot water in the chamber where you will brew, just be sure to empty out the water) put your 15 grams of ground coffee in and shake your ‘AeroPress’ side to side, you want to create a flat even bed of coffee.
Pour 30-50 grams of boiling water onto the grounds in the chamber and start your timer as soon as the water comes into contact with your coffee grinds. This process is called ‘blooming’. While I wait this is usually when I rinse my filter, simply by pouring enough boiling water to saturate your cap with the paper micro filter inserted, shake the excess water out and set aside.
Wait for the timer to hit 30 seconds, this is when you are going to make your first pour. I pour roughly 100 grams of water in and I like to give it a quick stir at this point.
At the 1min 30 second mark I attach the cap with the pre-rinsed filter paper onto the chamber, this helps contain the heat and prepares you for the next step. At this stage I pre heat my mug by pouring a bit of hot water and swirl it around before emptying into a sink.
As soon as the timer hits 2minutes ensure the cap is attached properly and invert your ‘AeroPress’ onto your mug. Please stress caution at this stage, you are using hot water and there is opportunity at this stage for things to go wrong. Slowly apply pressure on the plunger pushing your coffee out of the cap into your mug.
We recommend you use a sturdy mug and not any glass as your vessel, you are applying pressure and if the vessel you are brewing into isn’t suitable for hot liquids or can’t withstand the force from plunging it could break.
Weigh your yield by subtracting the weight of your brewing vessel and you should be getting around 130-140grams yield. This is due to the water retained in some of the grounds as well as however much water you used in your initial blooming process. The yield should always be slightly less then the total amount of water used.
To clean your ‘AeroPress’ couldn’t be easier and is arguably the most satisfying part of the entire brew. Simply remove the cap after the brewer has cooled down and over a compost or general waste bin press the plunger until your grinds shoot out and you hear a pop sound. Make sure the paper micro filter has been removed as well and wash the device thoroughly.
This brewing recipe can be simplified into the following:
Dose 15g
Yield 135g
Time 2 mins
Brew Ratio 1:9
The Brew Ratio refers to the relationship between the Dose (Coffee grinds used) as the first number and the yield as the second number. For example the ratio 1:9 tells us that for every 1 gram of coffee grinds used you will extract 9 grams of coffee.

The next recipe I want to share with you is for an espresso like extraction using the ‘Prismo’ ‘AeroPress’ attachment created by ‘Fellow’.
This time we will start off with the recipe and then we will discuss the instructions.
Dose 20g
Yield 60g
Time 2mins
Brew Ratio 1:3
First prepare your set up, have your utensils pre heated and your ‘AeroPress’ inverted (same as the previous recipe but this time there is no need to preheat your ‘Prismo’ filter or cap.)
Grind 20 grams of beans, this time we are going to grind finer than sand and aim for a ‘coarse cinnamon texture’. Put your beans in the ‘AeroPress’ chamber and on top of your scales.
At this point we usually bloom but in my recipe I like to just pour in 65-70grams of boiling water, start your timer and stir!
Stir for 1 minute. Stir like crazy! We are going to agitate this like crazy, the reason why we are stirring so much is because we are trying to mimic the properties of an espresso, I want to get that smooth crema like feel.
After the 1 min 30 second mark we will place the ‘Prismo’ cap and metal filter onto our ‘AeroPress’. Use the next 30 seconds to prepare and get your vessel ready, be sure that the vessel you choose to brew into is suitable for a lot of pressure. As unappealing as an espresso in a mug may look, ceramic mugs alleviate the risk of having a very big mess.
Invert the ‘AeroPress’ and squeeze! We are going to try to build up as much pressure into the chamber as possible. At the end of your extraction weigh out your yield.
When cleaning pop out the remainder of the grinds like the previous recipe but be sure to not accidentally throw out the stainless steel filter!

AeroPress Terminology:
‘AeroPress’: An ‘AeroPress’ is a patented versatile brewing device used to make different types of coffee easily and inexpensively.
Attachment: When we discuss attachments, it is in relation to the ‘AeroPress’, usually but not always created by another company.
Altitude: When we discuss altitude, it is usually in context to the height above sea level that the Coffea plant is initially grown, the altitude is amongst other variables that effect the flavour and other quality’s of coffee beans.
Brew time: Refers to the total amount of time in which the coffee and water are in contact.
Brew Ratio: A brew ratio is comprised of usually two numbers separated by a colon (:) the first number usually represents the amount of beans used in measurement of grams. The second number represents the yield in grams also and shows the relationship between both variables.
Bloom: Some recipes call for what is know as a “Bloom” or sometimes degassing. This is an initial introduction of water to coffee and is done to release most oxygen prior to your initial pour. This should not be confused with pre-infusion for espresso machines as this is to mainly used to control channeling.
Coarse: With any coffee recipe arguably the most important variable can be the size of your ground coffee beans. A coarse grind is gritty and larger than a fine grind.
Coffee recipe: A coffee recipe is usually comprised of four components; the dose used, the yield, brew time and your brew ratio.
Cold brew: Any type of coffee extraction preformed with cold water, this is an umbrella term. For instance; cold drip coffee is considered to be a cold brewed coffee. Cold brew coffee also refers to a specific recipe of coffee.
Cold drip: A type of cold brew recipe where cold water is usually dripped over coffee grinds to slowly brew and filter down into a vessel, the process depending on the recipe usually takes hours and most available equipment rely on gravity to pull the water through a cold drip coffee tower.
Dose: Simply put, the dose is the amount of dry coffee weighed in grams that is used in a recipe.
Espresso: A type of coffee that is usually comprised of a small amount of water almost at boiling point is forced through a puck of ground coffee with pressure.
Extraction time: Refers to the time it takes for you to extract coffee. Usually started when water is first introduced to your coffee and finished as soon as you have stopped brewing.
‘Fellow’: Is the name of a company who specialises in coffee brewers, Grinder’s, accessories and components.
Infuse: Means to steep in water for the purpose of extracting flavour.
Invert: Means to put upside down or in the opposite position.
Pour over: Is a type of brewing device where you pour water over grounds, it is also usually done over a vessel/mug to catch your brewed coffee.
Pre-heat: A step usually done prior to brewing where you pour hot water on your brewer or part of a brewing component, most times this water is disposed of before brewing starts and is only used to heat components.
Percolate: The process of a liquid slowly passing through a filter.
Single Origin Beans: Coffee beans that have not been blended with coffee beans from other origins. They have been sourced from a single place.
Variables: Is an element that has the ability to be changed or controlled to alter the result of something.
Yield: Usually weighed in grams the yield is the weight of the final product, it refers to the coffee that you end up drinking.