Ultimate Guide to Cold Brew Coffee
Everything you need to know about cold brew coffee.
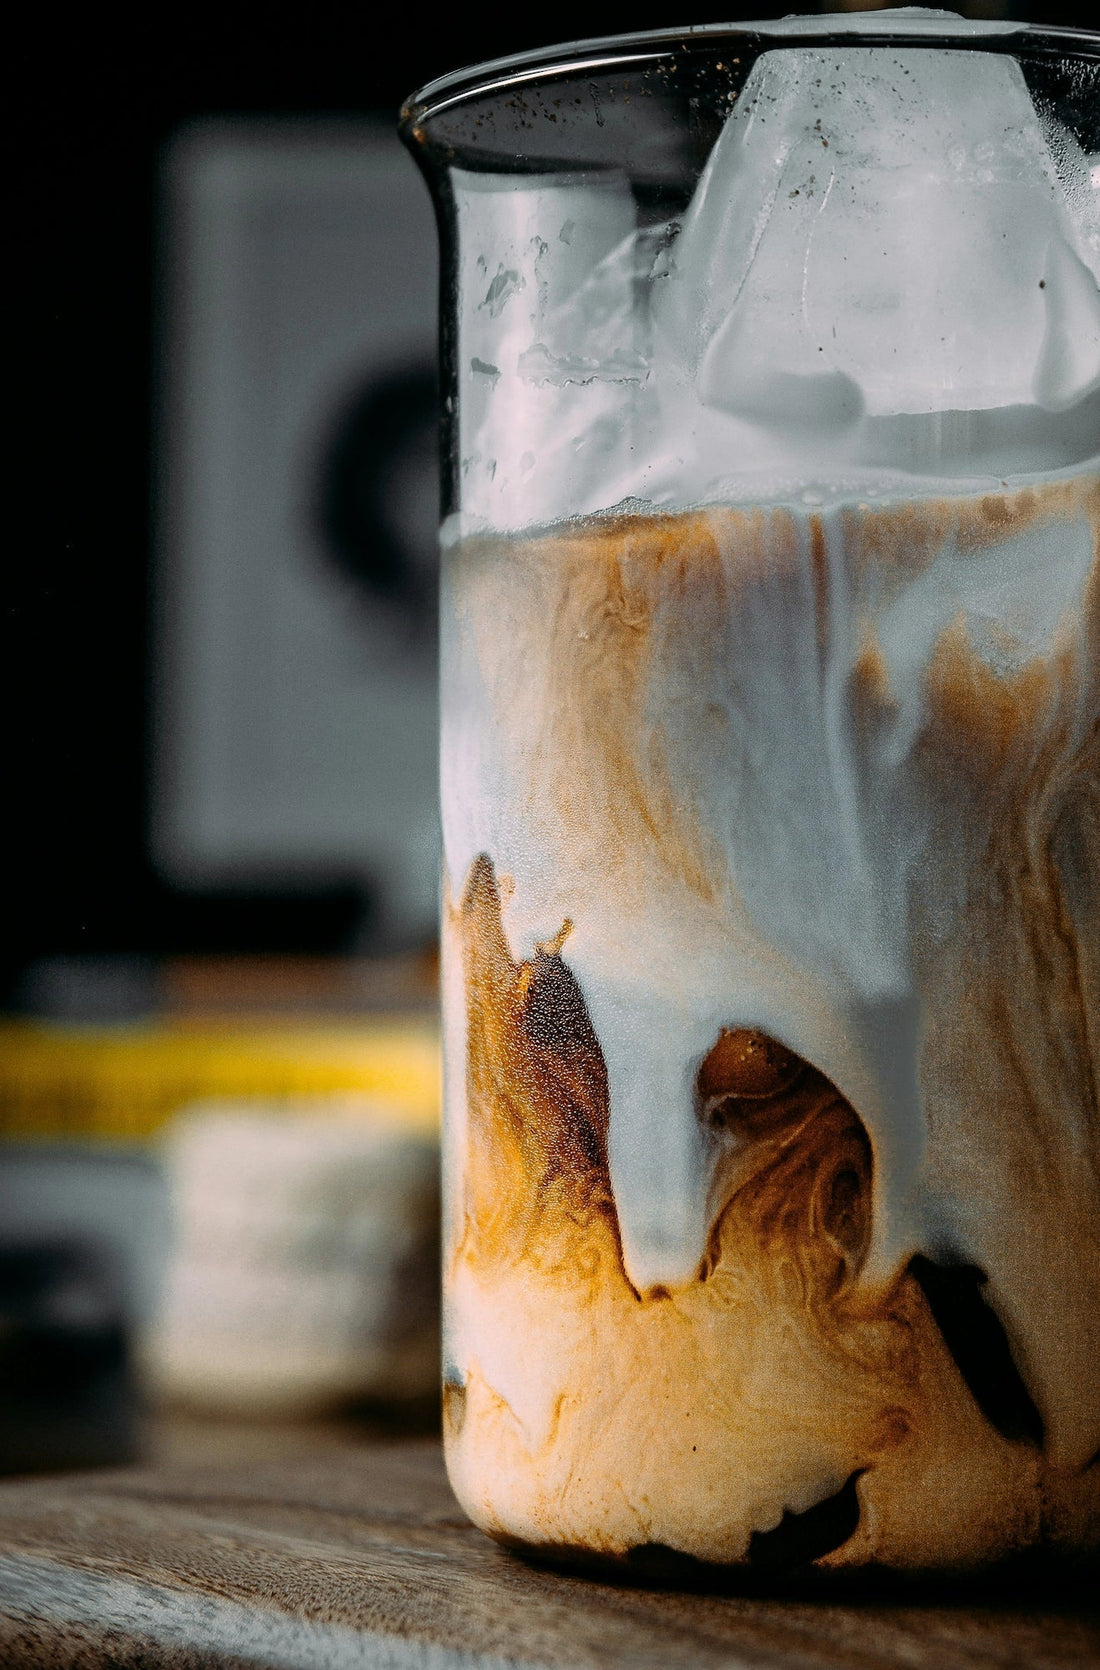
Coffee has evolved so much over time and us ‘coffee lovers’ are always looking for new ways to enjoy and improve the way we drink coffee and how we supply ourselves with that much needed caffeine hit.
Most coffee is extracted hot, there are a lot of benefits when extracting coffee using hot water. You can bring out some truely fantastic flavours but extracting coffee cold can be an extremely easy way to get some naturally sweet flavours and some much loved caffeine in a creative refreshing way.
A lot of cocktail recipes as well as Nitro coffee recipes call for using a cold brew coffee or cold brew concentrate as a base, so knowing how to make it will open up a new chapter of drink recipes for you.
The applications for cold brew in cafes are very appealing. With a quick set up, you can leave it to brew over night and once its filtered and decanted you can leave it in the fridge for up to 2 weeks.
What is the difference between cold brew and cold brew concentrate?
We drink cold brew at a brew ratio of 1:15 Most commonly we make cold brew concentrate using a 1:5 brew ratio and then dilute with additional water or other liquid that your recipe calls for. The difference is that a cold brew concentrate is much stronger and uses more coffee or less water depending on how much coffee you want to make all up.
Use our Coffee To Water Ratio Calculator to adjust your ratio and find out how much coffee and water to use!

What coffee should I use for cold brew?
If you want to drink your cold brew with milk, then an espresso blend will be perfect as that coffee is designed to be complimentary with milk. Keep in mind that espresso blends are used for latte’s and other milk based coffees.
Or...
If you are planning on drinking your cold brew straight black, then you might want to consider using a filter roast. Filter roasts are typically roasted lighter, can be bright, floral, fruity and are best tasted by themselves.
What is immersion in coffee?
When brewing coffee, sometimes you need to steep or immerse your grounds in water. This process is known as immersion and when making cold brew we typically use this process to extract our coffee. Further down this page we will also discuss a cold brew method that uses percolation.
Recipe 1: How to make a basic cold brew coffee
You will need:
- 40g of coarsely ground coffee
- 600g/ml’s of water (preferably filtered)
- Brew Ratio - 1:15
For this recipe you will need a container large enough to hold the 600ml of water & 40g of coffee grinds. It will also need to fit in your fridge so keep that in mind. if you have a french press with a 700ml capacity you can use this as well. (Using a french press is always a good idea because it makes filtering your grinds super easy.)
- Grind your coffee very coarse, like the consistency of sand and place it in the bottom of your brewer. Whether that is a french press or a regular container of sorts it doesn’t matter.
- Filtration, if you are using a french press you can skip this step. If you are using anything else you may find it easiest to put your coffee grinds in a cheesecloth and then place that in your container. Alternatively you can use a Hario V60 to filter your cold brew, I will talk about that more in step 5.
- Slowly pour your 600ml’s of water onto the coffee making sure to fully saturate all your grinds. (You might have some floating dry grounds, simply push them down into the water using the back of a spoon. try not to agitate or stir too much.)
- Cover your container and place in the fridge for 20-24 hours. If you are using a french press plunge until the metal filter sits just above the surface of the water.
- After your cold brew has finished brewing you can take it out of the fridge and filter. Simply plunge and pour if you are using a french press. (So easy!) Or remove the cheesecloth with grinds and gently squeeze out the remaining coffee. If you didn’t use the above 2 methods then you can also use a Hario V60 with a paper filter in it. This takes some time to drain but filters out all of the particles leaving you with an extremely clean final product.
- Enjoy. This is ready to drink and does not need to be diluted, this can be served on ice and if you don’t finish it don’t worry because you can store this in your fridge for up to 2 weeks.
What is the difference between espresso roast and filter roast?
Both espresso and filter roasts are made by blending and roasting green coffee beans to brown.
There are a couple of differences to keep in mind when distinguishing between the two.
Typically espresso roasts are darker roasted beans and the beans used are specifically chosen to compliment milk based drinks or to be drank alone as an espresso.
On the other hand filter roasts are generally lighter in colour and are much more fruity and bright. You can have a really light espresso and you can even grind up an espresso blend and use it for filter, the tasting notes will change as they have been roasted with the extraction method in mind but go for it, you might like it.
Recipe 2: How to make a super easy cold brew concentrate
You will need:
- 100g of coarsely ground coffee
- 500g/ml’s of water (Preferably filtered)
- +Additional water or milk of choice to dilute
- Brew Ratio - 1:5
For this recipe just like the above recipe we will need to use a container of some form or a french press. We are making a concentrate, so the only difference between this recipe and the previous one is not the method but how much coffee and water we use and that now we can choose what we use to dilute it with.
- Grind your 100g’s of coffee very coarse, like sand and place it in the bottom of your brewer, whether that is a french press or a regular container of sorts it doesn’t matter.
- Filtration, if you are using a french press you can skip this step. If you are using anything else you may find it easiest to put your coffee grinds in a cheesecloth and then place that in your container. Alternatively you can use a Hario V60 to filter your cold brew and I will talk about that in more detail in step 5.
- Slowly pour your 500ml’s of water onto of the coffee making sure to fully saturate all your grinds. (You might have some floating dry grounds, simply push them down into the water using the back of a spoon. try not to agitate or stir too much.)
- Cover your container and place in the fridge for 20-24 hours. If you are using a french press plunge until the metal filter sits just above the surface of the water.
- After your cold brew has finished brewing you can take it out of the fridge and filter, simply plunge and pour if you are using a french press. (So easy!) Or remove the cheesecloth with grinds and gently squeeze out the remaining coffee. If you didn’t use the above 2 methods then you can also use a Hario V60 with a paper filter in it. This takes some time to drain but filters out all of the particles leaving you with an extremely clean final product.
- What you are left with after filtration is concentrated, it is strong and needs dilution. If drinking with milk/milk alternatives add your cold brew concentrate to a glass with some ice and add 2 parts milk to 1 part of concentrate. Alternatively if you want to drink black then add your cold brew concentrate to a glass with some ice and add 1 part water, taste and if it needs more then add more until the desired consistency is reached.
- Store your cold brew concentrate in the fridge for up to 2 weeks or add your additional 1 part water to make a ready to drink cold brew coffee and then proceed to store that in the fridge. (If you are making large amounts, labelling what you have made can be helpful, although don’t worry about this if you are going to finish it off the day after.)
What is cold drip coffee?
‘Cold brew’ is a method of brewing coffee but it is also an umbrella term for any coffee brewing method which utilises cold water while extracting. Cold drip falls under this umbrella term of cold brew coffee but is made and tastes completely different. Cold drip coffee unlike the cold brew recipe above utilises the process of percolation and multiple chambers/valves to control drip rates.

How long does cold drip coffee take?
The process can take 2-5+ hours depending on which recipe and what equipment you use, This is especially a selling point for cafes as they can display a cold drip tower slowly doing its thing with little to no maintenance.
Recipe 3: How to make cold drip coffee?
You will need:
- *An AeroPress or AeroPress-Go (both are compatible)
- 1x Micro-filter paper
- A PUCKPUCK Cold Drip Attachment & 500ml Vessel or Evian water bottle
- 38g of medium ground coffee
- 400ml of water (Preferably filtered)
- 100g of ice
*We will only be using the AeroPress lower chamber & regular cap that comes with the AeroPress.
- Place 38g of freshly ground medium-coarse coffee into the lower chamber of the AeroPress on top of the filter cap, remember to put the splash filter on top of the coffee grinds (Included with the PUCKPUCK.)
- After attaching your water vessel or water bottle to the top of your AeroPress be sure to twist the PUCKPUCK closed and add your ice then water.
- Adjust your drip rate by slowly opening the valve, this will let a small amount of water out onto your coffee grinds, aim for around 50 drips per minute. Visit puckpuck.me to download the official PUCKPUCK app to get a correct drip rate quickly and easily.
- After the extraction is complete depending on your grind size and drip rate you should aim for a 3 hour brew time. Just like a traditional cold brew recipe you can store your delicious cold drip coffee in the fridge for up to 2 weeks. (If you can resist that long.)
Cold drip is super easy, it does require a small amount of practice but is relatively quick in perspective to other cold brew methods.
Making Cold Drip Coffee With the Delter Cold Drip Coffee Maker
Another option is to use the Delter Cold Drip Coffee Maker, this coffee brewer features a 3 tier water tower with a small hole at the bottom of each tray. This valveless design is great for consistency.
Simply add your ground coffee to the chamber and fill each tray up with filtered water before adding to the top of the tower. A pro tip is to add a paper AeroPress filter to the top of your coffee grounds, this acts as a water distributor and will make sure your coffee grounds are evenly extracted throughout brewing.
Leave your coffee to brew and you're done!


