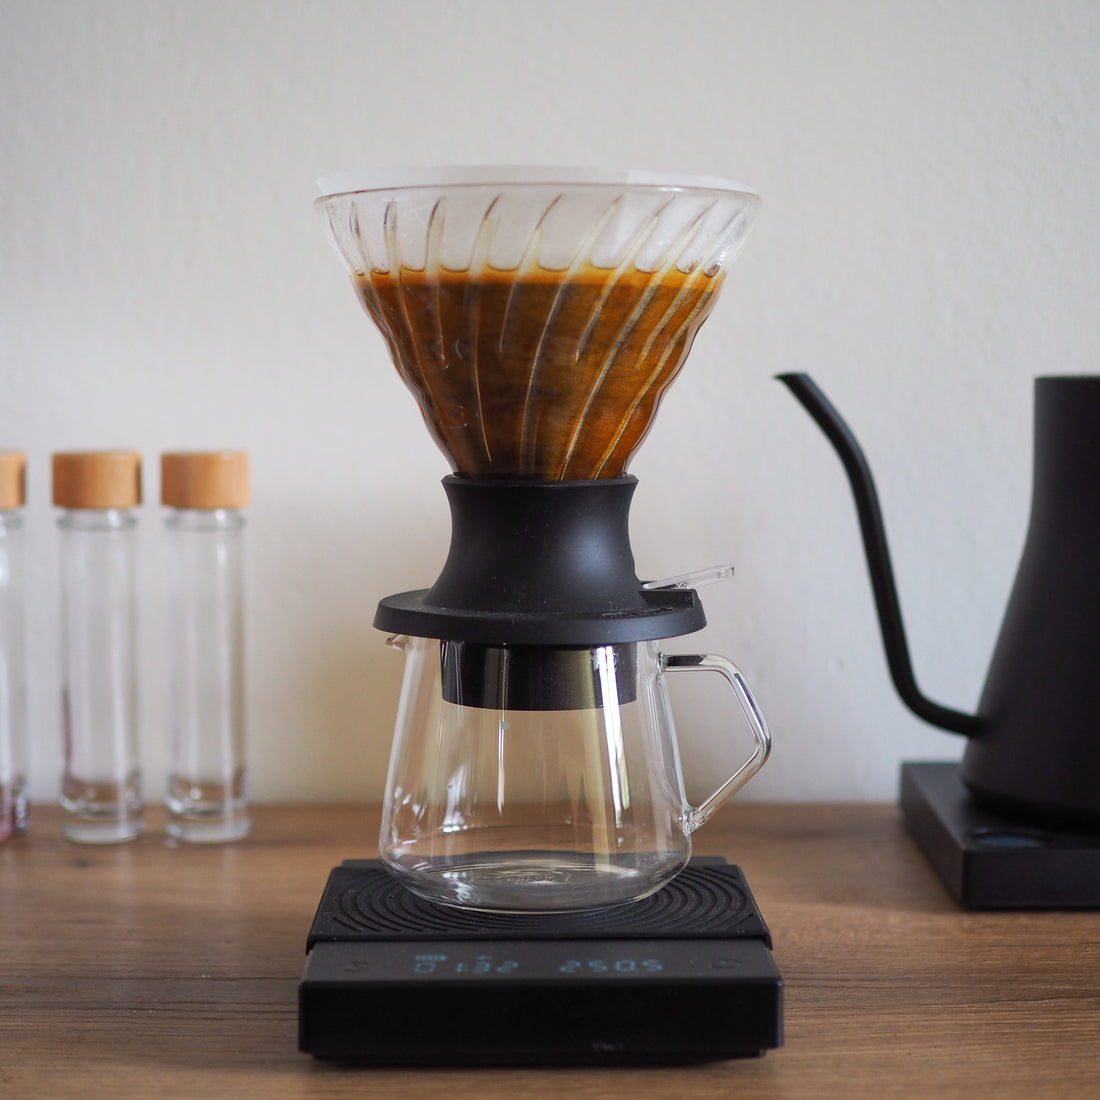
3 Recipes to try on the Hario Switch Dripper
Share this article
So you just purchased a Hario V60 Switch, or you are thinking about purchasing one and are wanting to weigh up your options. The good news is that you are in the right place and the even better news is that I am going to show you 4 recipes that make completely different styles of coffee and it can all be done on the Hario Switch.
First of all let's take a quick look at the Hario Switch and see how it works.
Image from Coffish
How does the Hario Switch Work?
The Hario switch has 2 main components, the first being the Glass V60 and the second which is a valve that is operated by a manual lever and ball bearing system. When the lever is in the upwards position the ball bearing closes the gap and creates a seal, to open the seal all you have to do is flick this lever down to the open position and the ball will be pushed up allowing the liquid to pass through.
Having a valve allows you to turn your Hario switch into an immersion brewer, percolation brewer or a hybrid of the two.
What is Immersion Brewing?
Immersion refers to the action of immersing something. Simply put, in the world of coffee Immersion brewing is when you are saturating coffee grounds in water and then usually filtering out the grounds. this method is commonly used in brewing tea as well as coffee.
What is Percolation?
To percolate means to pass through a filter, this method is used in a vast array of brew methods and has some benefits. Brewing using a percolation method has the advantage of water being in contact with coffee for a lesser amount of time while passing through the coffee bed, this can overall result in a more clearer tasting coffee and accentuate the more delicate tasting notes.
Image by @jairobernal.coffee
Recipe 1: Full Immersion
For our first recipe we are going to make a full immersion style cup of coffee. This style of coffee is full bodied, strong and you can expect a lot of complexity in the cup.
You will need:
15g Filter Roasted Coffee Beans
Hario V60 02 Equivalent size filter papers
Server / Cup
Kettle and water
First start by setting everything up, Grind your coffee to a medium grind size (25 clicks on Comandante) and Place your filter into your dripper.
Next we are going to set our filter, start by pre-wet your your coffee filter with hot water and open the valve to let everything flow through to your server, discard this water before going any further.
Add your coffee beans into your filter and make sure the valve of the dripper is in the closed position.
Start your timer and pour 100g of hot water over the grinds, ensuring that all the grounds are evenly wet. This is known as a 'Bloom' and helps to release the gasses prior to brewing.
At the 30 Second mark go ahead and pour an additional 150g of water over your coffee grounds and let this brew, pour your water in slow circles at an even height from your coffee bed.
Once your timer reaches the 3 minute mark press down on the switch, this will release the valve and your coffee will draw down into your server at around 15-30 seconds. This means your total brew time should take around 3:15 - 3:30.
Recipe 2: Full Percolation
For our second recipe we are going to make a full percolation style cup of coffee. This style of coffee is clean, high in acidity and well balanced, by brewing this style of coffee and the 'Full Immersion' style of coffee you will be able to taste the differences between the two methods of brewing.
You will need:
15g Filter Roasted Coffee Beans
Hario V60 02 Equivalent size filter papers
Server / Cup
Kettle and water
First start by setting everything up, Grind your coffee to a medium grind size (25 clicks on Comandante) and Place your filter into your dripper.
Next we are going to set our filter, start by pre-wet your your coffee filter with hot water and open the valve to let everything flow through to your server, discard this water before going any further.
Add your coffee beans into your filter and make sure the valve of the dripper is in the open position.
Start your timer and pour 50g of hot water over the grinds, ensuring that all the grounds are evenly wet. This is known as a 'Bloom' and helps to release the gasses prior to brewing.
At the 30 Second mark go ahead and pour an additional 50g of water over your coffee grounds and let this brew, pour your water in slow circles at an even height from your coffee bed and wait for your coffee to draw down completley.
We are going to repeat this 3 more times, all using 50g of coffee each until we reach a total brew weight of 250g.
Depending on the coffee you use your brew time will vary, in this coffee you can expect to taste a clear and well balanced cup so you may need to adjust your grind size and your water temp depending on the coffee beans you use.
Image by @rrrraaatth
Recipe 3: Hybrid Hario Switch
For this recipe we are going to make a Percolation / Immerison Hybrid cup of coffee, we are going to play around and utilise both styles of brewing to highlight different aspects of the coffee. To start off we will use a percolation style for the first 2 pours to highlight the acidity component of our coffee and then use an immersion style to increase the body and complexity of our coffee.
You will need:
15g Filter Roasted Coffee Beans
Hario V60 02 Equivalent size filter papers
Server / Cup
Kettle and water
First start by setting everything up, Grind your coffee to a medium grind size (25 clicks on Comandante) and Place your filter into your dripper.
Next we are going to set our filter, start by pre-wet your your coffee filter with hot water and open the valve to let everything flow through to your server, discard this water before going any further.
Add your coffee beans into your filter and make sure the valve of the dripper is in the open position, we are going to start off with the percolation brew.
Start your timer and pour 62.5g of hot water over the grinds, ensuring that all the grounds are evenly wet. This is known as a 'Bloom' and helps to release the gasses prior to brewing.
At the 30 Second mark go ahead and pour an additional 62.5g of water over your coffee grounds and let this brew, pour your water in slow circles at an even height from your coffee bed.
Once this has completely drawn down we are now going to close the switch and start brewing with an immersion style. Pour 125g of water and wait for 3 mins at the 3 min mark open the vale and release the coffee.
If you are wanting to taste the difference between the two styles and stages of brewing, you can release this into a different cup and taste them individually prior to combining the two.
Is the Hario Switch Dripper worth it?
I believe that the Hario Switch is best suited for 3 groups of people.
The first being the advanced coffee nerd that wants to push the boundaries of their coffee and toy with both immersion, percolation and hybrid styles of brewing coffee.
The second is the beginner brewer, people who don't know what coffee they like or haven't yet explored their options. Having a multi-brewer is quite beneficial and makes much better value sense compared to purchasing multiple brewers with single brew styles.
The third and what I believe to be the most exciting is the cafe setting. Using a Hario Switch removes a lot of the 'technique' side of brewing pour over coffees, by doing this your staff have to know only 4 things. Your coffee dose weight & grind size, How much water to use and when to flick the switch.
Depending on the experience level of your barista you can choose to brew a full immersion style recipe (easiest) or if they have more experience they can utilise a hybrid / percolation method.
When is the Hario Switch Dripper not worth it?
So is the Hario Switch worth it? If you fit into 1 of these 3 categories above then the answer is 'Yes'. I think the moment the V60 Switch doesn't become worth it is when you are a home brewer / hobbyist that already has multiple brewers and drippers that brew both immersion and percolation. While you could argue that you are wanting to explore 'Hybrid' style brewing I think this is when it becomes more novelty than anything else.


