There are many fantastic ways to brew using these brewers and we definitely don't believe that there is any recipe that trumps them all. In fact we would argue that being able to brew differently with the same brewer allows you to better understand and determine how exactly to bring out the best of the coffee you are brewing.
In saying this we also understand that some people don't have the experience or time to play around as much as we do, so we thought that it might be of some assistance to showcase our very own recipes for brewing, We are excited to announce our very first constantly reviewed 'Coffee Brewing Guide'.
We encourage you to try how we have been enjoying coffee this year.
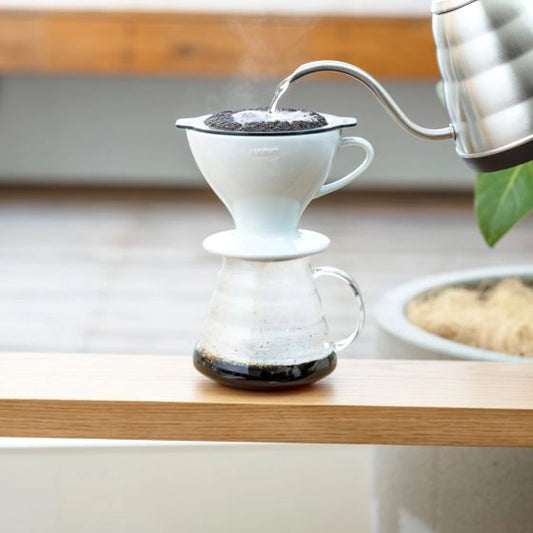
V60 Coffee Brew Guide:
The classic conical V60 was created by Hario and is arguably one of the most inexpensive way to brew consistent and delicious tasting percolated coffee.
We recommend using the plastic 02 Size dripper as we feel that it has the best heat retention properties and is the most readily available types of brewers, the size is perfect for brewing 1 or more cups of coffee.
Coffee
For our 2021 V60 recipe we recommend using 20 grams of light-medium roasted coffee ground at '25 Clicks' on the Comandante grinder +2/-2 relative to the coffee you are using. When writing this recipe we used a washed Ethiopian Coffee from Linear Coffee and felt that this brewing recipe created a fantastic syrupy body, enhanced its sweetness and brought out the coffees delicate floral intricacies.
Water
In this recipe we used water between 90-95ºC Depending on how dark the coffee is roasted. Usually the darker the roast = the more C02 gas trapped in the coffee and therefor released when in contact with water. To control this we use a hotter water temp when using lighter roasted coffees and a cooler water temp for darker roasted coffees.
Filter
We love using the Origami filtersas they are fast drawing, thick with low density and textured with Creping on both sides, This allowed us to brew with slightly finer coffee grounds. We also enjoyed experimenting by brewing the same coffee with different papers, the Cafec Roast Specific Filtershave different thicknesses, creped surfaces and densities allowing us to explore the coffee further.
For this recipe we will stick to using the Origami filters.
Technique
1. Place your filter into your Plastic 02 V60 and thoroughly pre-wet/heat.
2. Add 20 Grams of ground coffee at 25 Clicks.
3. Lightly shake your brewer to flatten out your bed of coffee and poke a dent in the centre.
4. Bloom with 50g of water for 30-45 seconds, make sure everything is wet and don't be afraid to give the bed of coffee a generous swirl.
5. (1st Pour 150g) Start pouring slowly in the centre and continue to trace circles while pushing outwards towards the edge of the brewer. Aim to sink any of the darker spots of coffee and steadily increase the flow rate of your pour (This doesn't mean to trace circles faster) By pouring quickly the aim is to saturate everything and commingle the grounds. Let the bed settle for a couple of seconds and swirl your V60 to dislodge any large coffee grinds stuck to the V60 walls.
6. (2nd Pour 100g) Start your final pour when your water level is just above the bed of coffee, this is when you initiate your secondary pour. Do this in a circular motion starting from the centre and try to maintain a steady speed unlike our first pour. The aim of this pour is not to mix or disturb your coffee bed too much but to try to keep the water level somewhat at the same point you should aim to be pouring for about 30 seconds.
7. Stop pouring when you have used all of your brew water and swirl your V60 to nock down any suspended coffee grounds and flatten your bed of coffee.
Iced V60 Coffee Brew Guide:
For our Iced V60 recipe we chose to feature a flash brew method, the fundamentals of how this works is similar to the V60 recipe but we use less water to make a hot concentrate and brew over Ice. All up we are using the same ratio of coffee to water but there are a couple of variables we tweak to assist us in making a higher extraction. After all it is important to remember that the ice is bypassing our brew and not interacting with our coffee.
Coffee
For this recipe we will need to grind slightly finer to increase the contact time between the coffee grounds and the lesser amount of water used to brew. We used coffee ground at 22 Clicks on the Comandante grinder, your grind size is the variable we suggest playing around with before changing your brew ratio, dose, water temp etc.
In this recipe we used water between 90-95ºC Depending on how dark the coffee is roasted. Usually the darker the roast = the more C02 gas trapped in the coffee and therefor released when in contact with water. To control this we use a hotter water temp when using lighter roasted coffees and a cooler water temp for darker roasted coffees.
We will be splitting our total water used (300g) into 150g of Ice and 150g Brewing water.
Filter
We found that using the Medium roast profile filters from Cafec gave an incredibly clean result, they are thick yet have a low density this attributes to an increase in contact time. These papers in specific are 'creped' on both the inside and outside, they have the largest surface area out of all 3 roast profile filters and allow for a smooth flow resulting in a balanced cup, especially when using less brewing water.
Technique
1. Place your Cafec T-90 filter into your plastic Hario V60 02 Dripper and Pre-wet/Heat your dripper.
2. Add 20 Grams of ground coffee at 22 Clicks.
3. Lightly shake your brewer to flatten out your bed of coffee and poke a dent in the centre.
4. Bloom with 50 grams of water starting from the centre and covering all of your coffee grounds, Swirl your bloom to guarantee saturation of everything.
5. After 45 seconds of blooming initiate your next pour by starting from the centre and working outwards in a circular motion aiming to sink all of the darker spots. Do this using 100 grams of water and try to draw out this pour for 25-30 seconds.
6. Swirl your brew directly after pouring and let the remainder of your coffee draw down with out any more assistance.
7. Combine with the 150grams of Ice if you haven't already and enjoy.
Origami Dripper Brew Guide:
The origami dripper closely resembles the Hario V60's conical shape, although the origami has 2 main differences in comparison.
1. Material: Unlike the Hario V60's range of either Metal, Ceramic or Plastic the Origami dripper is made from a lightweight porcelain material, this material is less dense then traditional ceramics and creates a higher heat retention within the brew.
2. Filter Contact (only relevant for conical filters) : The wide folds of the origami push the filter away from the surface of the dripper and allow air to flow freely. The more open space generally allows for less resistance with water flowing out of the filter and a quicker brew.
One of the reasons why we like using the Origami dripper because of its inherently faster drawdown, this allows you to experiment with filters that have a longer draw down and brew a cup of coffee with a closer brew time and discover more subtle differences.
We enjoyed using the Origami dripper similarly to the Hario V60 drippers but we also had some fantastic results replicating the No-Bloom method from Tales Coffee (Video below).
Water
We found best success when brewing with 88-94ºC for lighter roasts and 85-90ºC for darker roasts. We used the water temperature to help control the gasses released.
Coffee
We used coffee beans ground at 20 Clicks on theComandante grinder, your grind size is the variable we suggest playing around with before changing your brew ratio, dose, water temp etc.
Filter
We have experimented with many different types of filters and find that the traditional V60 filters were too fast drawing and did not offer enough resistance for this brewing technique. Instead we found fantastic results using the Cafec Light T-92 Roast profile papers.
Technique
1. Grind 20 grams of coffee at 20 Clicks on the Comandante grinder, Place these grounds in your pre-wet filter and create a small v-shaped divet in the centre.
2. Start pouring your water from the centre of the bed of coffee and push the water outwards to cover the bed of coffee, ever increasing the flow rate of your pour.
3. Develop from tight circles to larger ones and build up momentum until you have reached your entire brew water while pushing down any darker floating parts of coffee grounds.
4. Agitate your brew by stirring one final time and letting everything settle and draw down completley.
AeroPress Coffee Brew Guide:
The AeroPress is a really fantastic brewer to start off making coffee in the sense that it is easy to use, requires less experience for technique, is very forgiving on grind size/distribution and makes a bloody good coffee.
Coffee
In this recipe we used 15 grams of coffee that has been ground at 22 clicks on theComandantegrinder. Just like all of our recipes you should start off with our recommendation and then adjust depending on what tastes goods to you.
Water
In this recipe we enjoyed using water around 95ºC, this was for a medium roast naturally processed Colombian coffee but you can always adjust your water temperature. We used a total of 240g in 1 pour.
Filter
There is a wide range of different filters available for the AeroPress (Not as many as compared to the V60's) We like the taste of the standard AeroPress Micro-Filters. You can also use more then 1 filter when brewing with the AeroPress to create a cleaner cup and build up resistance when plunging.
Technique
1. Grind 15 grams of coffee and place it in the chamber with the plunger seal creating a base, this is called an inverted method and it stops the coffee from flowing out prematurely.
2. Pour in 240 grams of water while trying to saturate all of your grounds and sink down any dark spots that rise up to the surface, It does not matter how you pour but the quicker the better.
3. Stir like a mofo for 10 seconds, get everything saturated and commingled, a silky foam should form on top and then leave it to brew.
4. Pre-wet your filter inside of your filter cap, depending on the type of texture coffee that you prefer you can use 1 or 2 filters to build up some resistance and filter out more oils and compounds.
5. Screw your filter cap with the filter onto your AeroPress chamber and flip the AeroPress so that the filter cap is faced down over your Cup/Server.
6. At the 2 minute mark start plunging slowly and aim to finish plunging after 30-45 seconds. Your grind size and how many filters you use will attribute to how much resistance you will feel when plunging. (as well as the taste)
Iced AeroPress Coffee Brew Guide:
We love this recipe! It has a delicious syrupy body, a bright vibrant acidity and an incredible sweetness that shines through.
Coffee
We used the same as the previous AeroPress recipe, naturally processed Colombian coffee from El Parche Coffee Roastersand ground it at 20 clicks on the Comandante Grinder.
Water
We used water boiled at 94-96ºC and found that for this roast level 95ºC was spot on and standard for brewing. We suggest that you play around with the grind size before changing your water temperature. We divided up the water for exactly half to be used for brewing and the other half to be used as ice (160g Brew Water + 160g Bypass Ice = 320g Total).
Filter
We like the taste of the standard AeroPress Micro-Filters.You can also use more then 1 filter when brewing with the AeroPress to create a cleaner cup and build up resistance when plunging. For this recipe we used 1 filter and the body resulted in a delicious syrupy finish.
Technique
1. Grind your 20 grams of coffee to 20 Clicks coarse on the comandante or as close as you can to the reference image provided above.
2. Insert your coffee into the chamber of the AeroPress and pour in 160 grams of water at 95ºC aim to cover all of the coffee grounds and saturate all of the darker spots of coffee.
3. Stir everything together after you finish pouring your water, this breaks up the crust (if any crust has formed on the surface) and makes sure that there is no grounds at the bottom that have been missed.
4. Carefully flip your AeroPress over so that the filter cap is on top of your vessel/mug. Slightly lift the plunger up to create a vacuum and stop the drips.
5. Start plunging at the 2 minute mark this should last anywhere from 30-45 seconds, pour this over your 160 grams of ice and mix thoroughly prior to drinking.
Japan is pioneering the coffee dripper space, they are the leading coffee dripper manufacturers and exporters recently we have seen more and more up and coming brands such as Orea produce...
Japan is pioneering the coffee dripper space, they are the leading coffee dripper manufacturers and exporters recently we have seen more and more up and coming brands such as Orea produce...
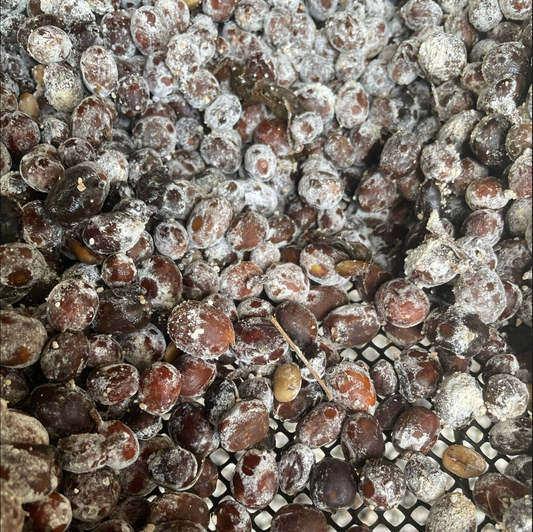
Koji fermentation has been an age long technique in culinary methods, most famously used to produce soy sauce, miso, and sake. In recent years, coffee innovators have started to experiment...
Koji fermentation has been an age long technique in culinary methods, most famously used to produce soy sauce, miso, and sake. In recent years, coffee innovators have started to experiment...
Today the Flair 58 is going head to head with the Wacaco Picopresso, we are going to comparethese two competing manual espresso makers to see which one will come out...
Today the Flair 58 is going head to head with the Wacaco Picopresso, we are going to comparethese two competing manual espresso makers to see which one will come out...
1 / of3
DON'T MISS OUT!
Be the first to hear about New Products, Flash Sales and Events by joining our mailing list.