How To Make The BEST Iced Coffee
Share this article
If you love pour over / filter coffee but feel that your iced coffee is weak, bitter or just isn't hitting the same, then this article is for you!
I love drinking iced coffee but I don't like most cold brew or cold drip recipes and this is because I found them to be low in acidity, watered down and overall quite sad, this quickly changed when I learnt about flash brewed coffee.
What is Iced Flash Brew Coffee?
Flash brew is very similar to pour over coffee but with half of the brew water replaced with ice. For example a traditional pour over recipe with 20g of coffee and 300g of brew water now becomes 20g of coffee, 150g of brew water and 150g of ice placed in your server.
Why is Flash Brew Coffee Better?
Brewing with hot water has many advantages compared to brewing with cold water commonly found in cold brew / cold drip recipes. This is because the heat helps to extract more flavour and acidity into your cup of coffee. Flash Brew coffee also accounts for the ice slowly melting and diluting your coffee into the perfect ratio of coffee to total water.
Iced Flash Brew Recipe:
Ingredients:
- 20g Freshly Roasted Filter Coffee Beans
- 150g of Water at 95ºc
- 150g of Ice Cubes
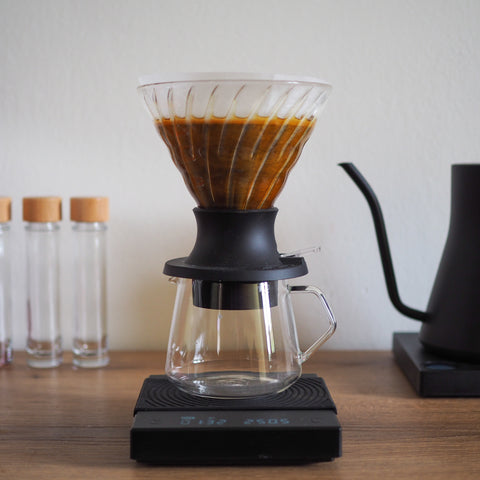
- Hario V60 Switch Coffee Dripper
- Coffee Server
- Coffee Filter paper / Aji Filter
- Coffee Brewing Scale
- Comandante C40 Coffee Grinder / Ground coffee beans
Recipe:
- First we need to set up our brewing station, to do this place a filter in the Hario V60 Switch and pre wet with some hot water. Make sure to dispose of this hot water.
- Place your 150g of Ice into your server and then put the Hario Switch on top, ensure that the valve is in the closed position by flicking the switch upwards.
- Grind your coffee to a grind size between 15-20 clicks on the Comandante C40, this will depend on the coffee beans you are using. (If you are using our Ethiopian coffee use a grind size of 18 clicks) and then add the ground coffee to your V60 dripper.
- Now it's time to brew, tare your coffee scales and start the timer at the same time you start pouring your hot water. Add an initial 100g of water at 95ºc and try your best to cover all of the ground coffee.
- After 40 seconds your coffee has had time to bloom and now you can add the rest of your brew water, continue pouring until you have reached a total of 150g. Let your coffee brew and stir / swirl to ensure everything is evenly saturated and brewing correctly.
- When your timer hits the 2min 30second mark we are ready to open the Hario Switch valve and release our hot coffee over the 150g of ice, this process of coffee drawing down should take around 20-45 seconds depending in your grind size and coffee you are using as well as some other variables.
- Once your coffee has completly finished drawing down and brewing you can remove your Hario Switch and serve your Iced Flash Brew into a cup, no need to add any more ice as this is the perfect ratio of coffee to water.
How To Adjust The Recipe:
The recipe above makes a delicious flash iced pour over coffee but it doesn't account for if you are wanting to add milk, coffee creamer or other additives.
To do this without making a weak coffee heres what you can do:
The golden ratio is 1:15 this stands for 1 part coffee beans to 15 parts water, this ratio is balanced in the recipe above as we used 20 grams / parts coffee to 300g / parts Ice and brew water. The moment you add milk or anything else to the drink your ratio starts to stretch out and taste thin / weak, to avoid this its super easy.
All you have to do is account for the extra milk, to do this in a seperate container weigh out how much milk you are wanting to add. for this example let's say you want to add 50g of milk. Next we are going to remove that same ammount to our brew water and ice, this new recipe would look like this:
" 20g coffee + 125g Brew Water + 125g Ice + 50g Milk "
After you brew this, make sure to taste it and see if it is too weak / watered down, you may need to adjust some other variable besides the ratio to make it taste balanced and delicious.
3 Recipes to try on the Hario Switch Dripper


