Why Pour Over Coffee is the Best Coffee to Make at Home
Share this article
Since Covid back in 2020 the home coffee equipment industry has absolutely boomed and is continuing to increase in popularity. Because of this, more and more people are brewing coffee at home and venturing down the rabbit hole of making pour over coffee.
When it comes to home brewing there are so many different options, this can be problematic and overwhelming when starting off but if you're here and you're considering starting to make pour over coffee at home then you're in the right place.
Your Very First Pour Over Coffee
The very first thing you do before you buy any equipment or make any decisions is to try a pour over coffee, go to a local specialty cafe / coffee roaster that serves pour over coffee and make sure you actually like the taste.
Usually most cafes and coffee bars will have a list of different single origin coffees to choose from and if available I strongly recommend choosing a Natural Ethiopian.
So many people who are professionals in the coffee industry had their first Ethiopian coffee and describe their first pour over experience as being unique and the start of a long lasting career in this industry.

Espresso Machine Vs Pour Over Coffee
We specialise in pour over and manual brewing here at Basic Barista and it is safe to say that because of this we are biased.
But I wan't to continue this and tell you exactly why we focus on pour over coffee. There are multiple reasons why brewing pour over coffee is better than an espresso machine but the main ones are that pour over coffee is significantly cheaper and much more cost effective, suitable for beginners, intermediate and professionals, drinking pour over is better for your health compared to milk based coffees, pour over coffee is more forgiving than espresso and finally drinking pour over coffee will improve your sense of taste much more easier than lattes.
Pour Over Coffee is Significantly Cheaper
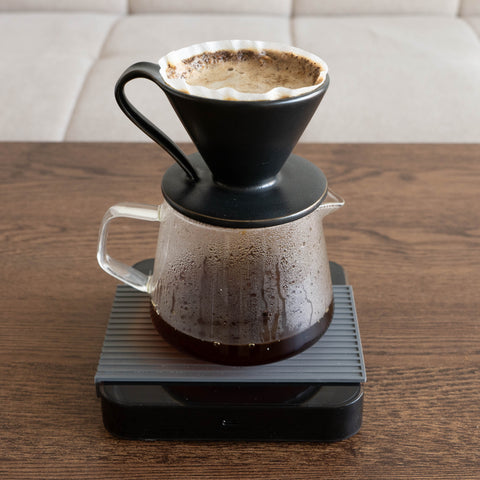
One of the biggest advantages to making pour over coffee is the set up cost is much more cost effective, presuming you have a kettle and coffee grinder you can pick up a budget Hario V60 Dripper and some filter papers for less than $35.
Not only is it much cheaper than an espresso machine but you save on coffee too, for 1 cup of pour over coffee (250ml) you only need 15g of coffee beans. Comparing this to a 20g dose of coffee for an espresso and the milk used to make lattes and flat whites this really does start to add up.
Suitable For Beginners and Professionals
Anyone can make pour over coffee, it's certainly not rocket science.
Starting out with a cheap coffee dripper, a budget grinder, some filters, a kettle and you're good to go.
When it comes to professionals making pour over coffee i'll admit that things start to get expensive, upgrading to a premium coffee hand grinder, precision coffee brewing scales, using unique and expensive drippers and having an arsenal of different coffee filters at your disposal does add up.
The advantage to pour over coffee is that even in it's most elaborate form it is still not going to be as expensive as a good home espresso machine.
Pour Over Coffee is Less Wasteful
Pour over coffee produces less waste compared to espresso machines. Without the need for electricity or plastic pods, it's an environmentally friendly option. Brewing pour over coffee uses beans, water and a coffee filter usually made from biodegradable materials such as paper or a reusable cloth coffee filter.
Continuing on our previously point, usually the coffee used to dial in espresso is around 3x doses where as for pour over it isn't as finicky and doesn't need to have such a precise grind size to still be drinkable.
The Ritual of Pour Over Brewing
There's a meditative quality to making pour over coffee that espresso machines just don't replicate. Starting your day brewing pour over is half about drinking the coffee and half about the process. Theres something hypnotic about pouring water over coffee grounds, smelling the aromas and pouring it into your coffee cup that you can't get from pressing a button on a pod machine.
Very Basic Pour Over Coffee Recipe
This is by far the simplest pour over coffee recipe you will ever come across, suitable for beginners with minimal gear designed to get the best out of what you have.
You Will Need:
- 1x Budget Hario V60 Dripper
- 1x Hario V60 Coffee Filter Paper
- 15g of filter roasted coffee beans
- 250g of water at 95ºc
- Coffee mug
- Set of coffee brewing scales
Basic Pour Over Coffee Instructions:
- First start by weighing out 15g of coffee beans, grind your coffee on a medium grind size that looks like its a bit finer than ground table salt.
- Place your coffee filter inside your Hario V60 Dripper and add some hot water to remove the papery taste from the filter. Collect the water in your coffee cup or coffee server and make sure you tip this water out so it doesn't end up in your coffee.
- Add the 15g of ground coffee to your filter inside the pour over coffee dripper and tap the sides of the Hario V60 to level out the bed of ground coffee.
- Start pouring 50g of hot water over the ground coffee and as soon as your coffee hits the bed of coffee grounds start the timer on your scales. This first pour of water is known as the 'Bloom' and the aim is to quickly and evenly saturate all of the coffee grounds with hot water and allow your coffee to release the stored gasses trapped inside.
- After the bloom you want to wait for 30-40 seconds before pouring your next round of water, this time you want to slow things down and try to get a steady controlled stream. Aim to pour 100g of water and then wait for this water to draw down again.
- Repeat step 5 and pour an additional 100g of water in a slow circular motion, your total brew weight should now be 250g and your brew time should be anywhere around 2-4 minutes depending on how coarse you ground your coffee beans.
- Remove the Hario V60 Dripper when you can see the bed of coffee and the coffee has completly drawn down to the bottom, enjoy your coffee and take notes on the taste.

Intermediate Pour Over Coffee Recipe (No Gooseneck Kettle)
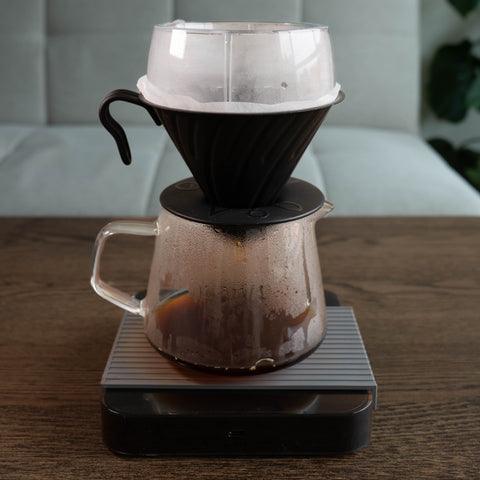
In this recipe we are still going to avoid using a gooseneck kettle, instead we will be using the Hario V60 Drip Assist this is an accessory designed to lower the agitation and doesn't require a gooseneck coffee kettle to make great tasting pour over coffee.
We are also going to be using a higher quality filter paper and a coffee from our Exotic range of coffee beans, higher quality coffee is going to make a monumental difference to how your filter coffee tastes.
You Will Need:
- 1x Hario V60 Dripper
- 1x Origami Coffee Filters
- 20g of Filter Roasted Exotic Coffee
- 300g of water at 95ºc
- Coffee Server / Coffee Mug
- Precision Coffee Scales
- Hario V60 Drip Assist
Intermediate Pour Over Coffee Instructions:
- First start by weighing out 20g of Exotic Filter Roasted Coffee Beans, grind your coffee slightly finer but still on a medium grind size that looks like its just finer than ground table salt.
- Place your Origami coffee filter inside your Hario V60 Dripper and add some hot water to remove the papery taste from the filter. Collect the water in your coffee server or coffee cup and make sure you discard this water so it doesn't end up in your coffee.
- Add the 20g of ground coffee to your filter inside your pour over coffee dripper and tap the sides of the Hario V60 to level out the bed of ground coffee.
- Place your Hario V60 Drip assist on top of the Hario V60 Dripper, take note of the two sets of rings that you can pour water into, the middle section has larger holes that have a fast flow rate and the outer ring of holes offer a slower flow of water.
- Start your timer as soon as you start pouring water, pour 60g of water into the middle section of the holes.
- Wait for 45 seconds before pouring your next round of water, pour an additional 50g of water over the outer section of holes for a slower flow rate.
- Repeat step 6 and continue pouring 60g pours of water in the outer set of holes until you reach a total of 300g brew water. Wait until the water completly draws down through the bed of coffee before you start your next pour.
- Remove the Hario V60 Dripper when you can see the last pour has completly drawn down to the bottom, pour your coffee into a cup if you're using a server and enjoy your coffee and take notes on the taste.

Advanced Pour Over Coffee Recipe
Take your pour over coffee to the next level, using high quality specialty coffee beans paired with the best equipment available you can achieve perfect brews customised to taste exactly how you like.
Get the most out of your coffee with this advanced pour over coffee recipe.
You Will Need:
- 1x Hario V60 Dripper Metal
- 1x Sibarist Fast Cone Filters
- 15g of Filter Roasted Exotic Coffee
- 250g of distilled water
- Apax Lab Water Minerals Set
- 1x Gooseneck Kettle
- 1x Comandante C40 Coffee Grinder
- 1x Coffee Server
- 1x Ni Wares Bouba Cup
- 1x Precision Coffee Brewing Scales
- Di Fluid TDS Coffee Refractometer
Advance Pour Over Coffee Instructions:
- Start by placing a Sibarist filter paper into your Hario V60 Dripper, fold the crease edge and use hot water to place it inside your coffee brewer. Discard this water and use it to pre-heat your Ni Wares Bouba Cup.
- Grind 15g of Exotic Filter Roasted Coffee Beans at a finer grind size, you don't want to get it too fine but and you want to still feel some grit when you squeeze the coffee grounds. If you are using a Comandante start off at around 20 clicks.
- Pour your coffee grounds into your filter and use a WDT tool or a toothpick to evenly distribute the coffee grounds, make a the bed of coffee flat slowly stirring deep and then slowly moving towards the top of the bed of grounds.
- Place your dripper back on top of your coffee server and scales, start pouring 50g of demineralised water at 80ºc over your coffee grounds and allow your coffee grounds to bloom for 45 seconds.
- After the 45 seconds using 92ºc water start pouring in slow low circles, you want to aim to have a consistent and controlled pour, pour 100g and allow for this to draw down completely.
- Once this has drawn down, start pouring another 100g at 92ºc, wait for it to draw down and finish off with a final 50g pour.
- Swirl your coffee in your server and pour a small amount into your Bouba cup to sample.
- From this sample use your Di Fluid R2 Refractometer, this will measure the TDS (Total Dissolved Solids) and your extraction percentage.
Taste this sample and using the Apax Lab Water Minerals Set, minerals the coffee directly to highlight characteristics of that coffee. - Once happy with the taste of your coffee add the mineral composition to your coffee in the server and give it a generous swirl.
- Pour this coffee into your Bouba cup and experience it through both the thin and thick lip of the coffee cup.


